NEWYou can now listen to Fox News articles!
It’s unfortunate, but bad things happen to phones all the time. For instance, they break when dropped or get stolen. Many people have lost precious memories because of it. Moving photos and videos off your phone is the best way to protect them and free up storage space without permanently losing them.
You can use several reliable methods, whether you’re using an iPhone or an Android device, to transfer photos and videos from your phone to a computer or cloud storage. Keep reading to find out how.
Join the FREE “CyberGuy Report”: Get my expert tech tips, critical security alerts and exclusive deals, plus instant access to my free “Ultimate Scam Survival Guide” when you sign up!

A person taking a photo on their smartphone (Kurt “CyberGuy” Knutsson)
How to transfer iPhone photos and videos using iCloud
iPhone users can also use Apple’s cloud storage service, iCloud, to automatically sync and back up their photos and videos to the cloud. This will also make them accessible across all your Apple devices, as well as Windows. Follow these steps:
- Open Settings on your iPhone.
- Tap [Your Name].
- Tap iCloud.
- Tap Photos.
- Toggle on Sync this iPhone to start automatically backing up your photos to iCloud.
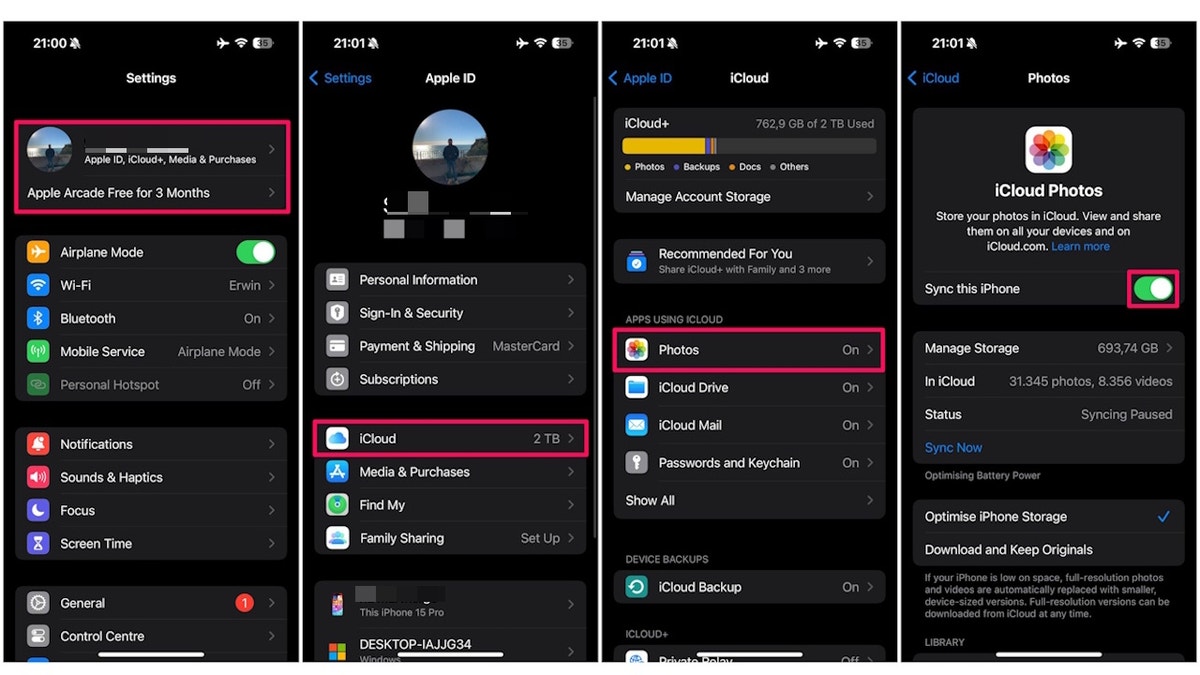
Steps to turn on iCloud photos on iPhone (Kurt “CyberGuy” Knutsson)
When you turn on Sync this iPhone, your photos and videos will be automatically uploaded to iCloud and securely stored in their original, full-resolution formats.
Now, wait for the photos and videos to upload
- Open the Photos app.
- In the top-right corner, check the syncing status (look for a circle or badge around your profile icon).
- If you see a partially filled circle, your photos are still uploading, so wait until it’s complete.
Be aware that just syncing your photos and videos to iCloud doesn’t immediately free up space on your iPhone. You’re creating a copy in iCloud, but the full-size photos and videos still remain on your phone. Now that your photos and videos are backed up to iCloud, here’s the crucial step to actually clear space on your iPhone. You’ll need to enable a special setting called Optimize iPhone Storage. Here’s how to do it:
- Go back to your iPhone Settings.
- Tap your name at the top.
- Then tap iCloud.
- Next, click Photos.
- Now, tap on Optimize iPhone Storage, and you’ll see a blue check mark appear.
This setting keeps smaller, space-saving versions of your photos and videos on your iPhone while the full-resolution originals stay safely stored in iCloud. This way, your iPhone frees up storage space without deleting any photos and videos. However, note that this depends on the number of photos and videos you have and the overall space used. Optimizing doesn’t guarantee immediate, huge storage savings. It can take time, especially for 4K videos.
Pro tip: Don’t delete photos and videos manually to save space. If you delete a photo or video on your iPhone, it’s also removed from iCloud. Let the “optimize” setting do the work for you.
Best iPhone photo and video backup alternatives to iCloud (No subscription needed)
For those of you who prefer not to pay for iCloud storage, several reliable products allow you to offload photos and videos from your iPhone, freeing up space while keeping your memories secure, without a recurring fee. Check out our top iPhone backup alternatives that don’t require a subscription.
These external storage options offer a range of features to suit different needs, allowing you to prioritize what matters most, whether it’s portability, storage capacity, speed or ease of use. By choosing the right device, you can efficiently manage your iPhone storage and avoid ongoing iCloud fees. Just remember to confirm that all photos and videos have been safely transferred before deleting them from your iPhone. Now, you’ll also want to be sure to check this hidden folder on your iPhone that may be eating up your space.
HOW TO MANAGE PHOTOS AND VIDEOS ON A NEW LAPTOP WITH LIMITED SPACE
How to transfer and free up space with Google Photos on Android
Google Photos is a convenient cloud storage solution that works across all devices, offering both free and paid storage options for backing up your photos and videos securely. You can back up your phone’s photos and videos to Google Photos with the steps below.
- Download and install the Google Photos app on your phone from the App Store or Google Play.
- Sign in with your Google account to access all features.
- Tap your profile picture icon in the top right corner.
- Tap Google Photo settings in the menu.
- Tap Backup.
- Toggle on Backup to start syncing your photos to Google Photos.
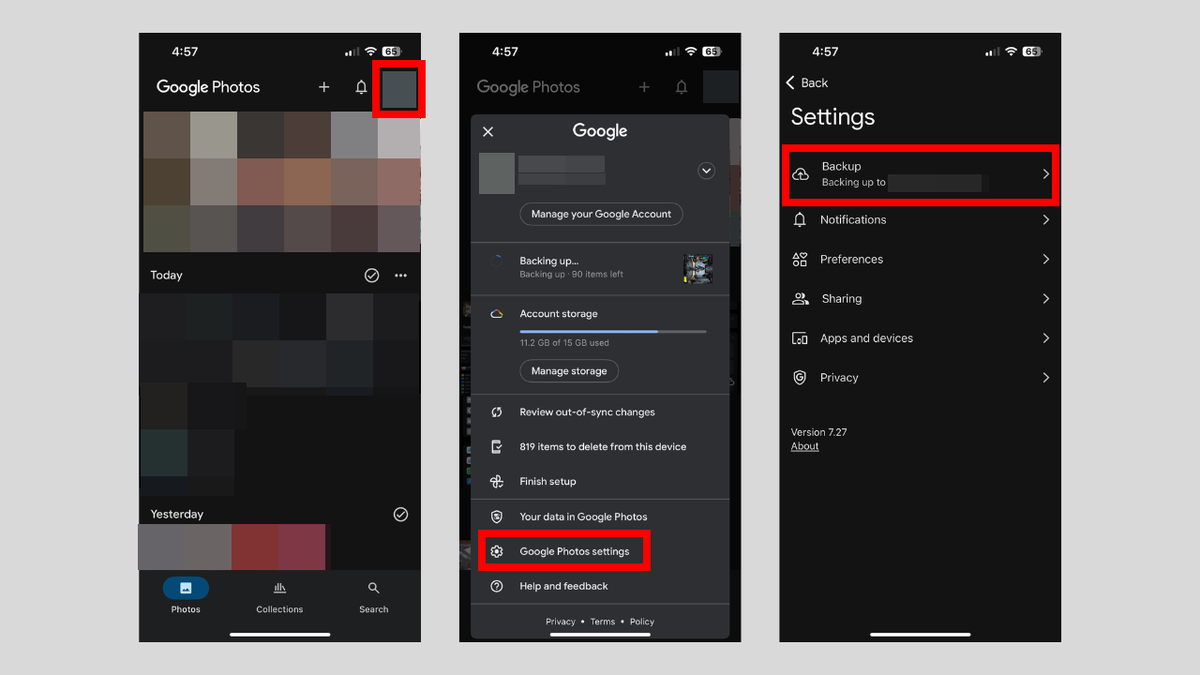
Backing up photos to Google Photos on iPhone (Kurt “CyberGuy” Knutsson)
Now that your photos and videos are safely backed up to Google Photos, you can free up space on your Android device:
- Open the Google Photos app.
- Tap your profile picture or initial in the top right corner.
- Tap Photos settings.
- Tap Free up space.
- Google Photos will identify photos and videos that have already been backed up and offer to delete the local copies from your device storage.
- Confirm to remove these items from your phone. Don’t worry, your photos and videos will still be accessible anytime in the Google Photos app or at photos.google.com.
That’s it. You’ve now backed up your photos and videos, freeing up valuable storage space on your Android device.
Remember to empty the ‘Recently Deleted’ or ‘Trash’ folder
On both iPhone and Android, deleted photos and videos usually go to a “Recently Deleted” or “Trash” folder and stay there for up to 30 days. To immediately free up space and ensure your photos and videos are truly gone, open this folder and permanently delete the photos and videos.
Pro tip: Always make sure your photos and videos are safely backed up before deleting them from your phone.
Accessing and downloading your photos and videos from the cloud
With the photos and videos stored safely on the cloud, you can access and download them anytime. Here is what you need to know:
Google Photos: You can access the photos and videos using the Google Photos app on either your Android device or iPhone. You can also go to the Google Photos website on your computer and sign in with your Google account to find the photos and videos.
iCloud (iPhone): Go to iCloud.com and sign in with your Apple account. Afterward, click Quick Access in the top-right corner and select Photos in the menu, and you should then be able to see your uploaded photos and videos.
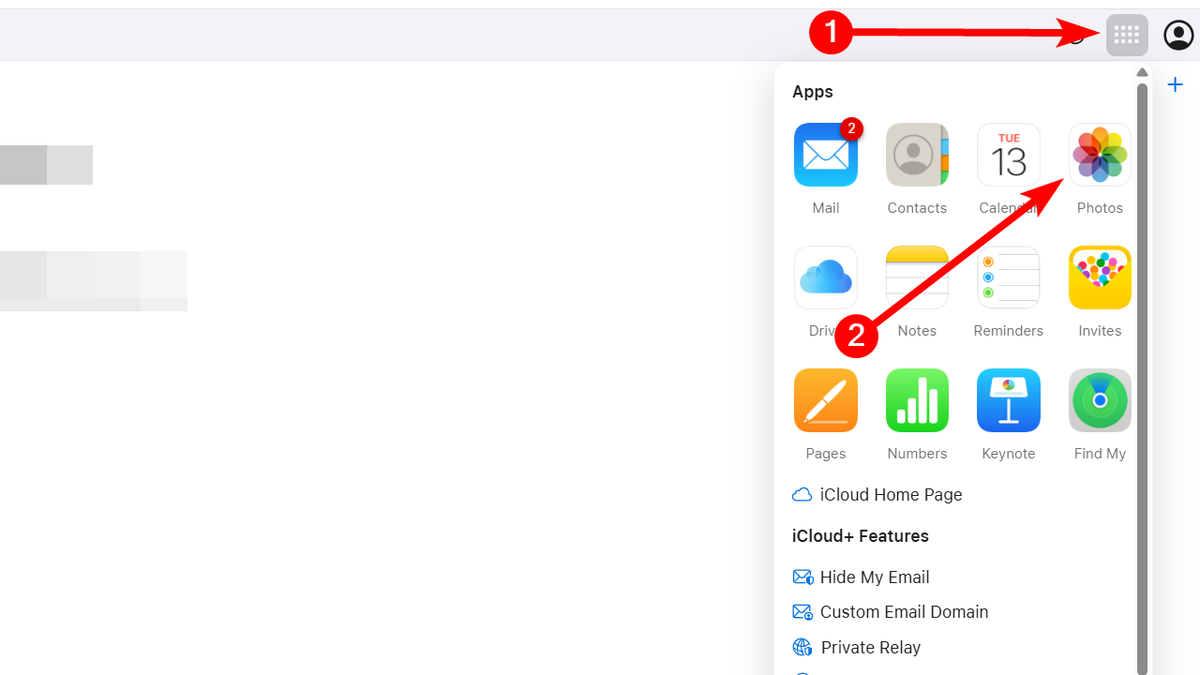
Steps to access and download your photos and videos from the cloud (Kurt “CyberGuy” Knutsson)
HOW TO REMOVE YOUR PERSONAL INFO FROM PEOPLE-SEARCH SITES
How to transfer photos and videos from your phone to a Windows PC using the Photos app
If you’re a Windows user, you can easily transfer photos and videos from your phone using the built-in Photos app to import your pictures and videos directly to your PC. Follow the steps below to do that.
- Connect your iPhone or Android phone to a Windows computer using a USB cable.
- Open the Photos app.
- Click Import in the top-right corner of the computer screen.
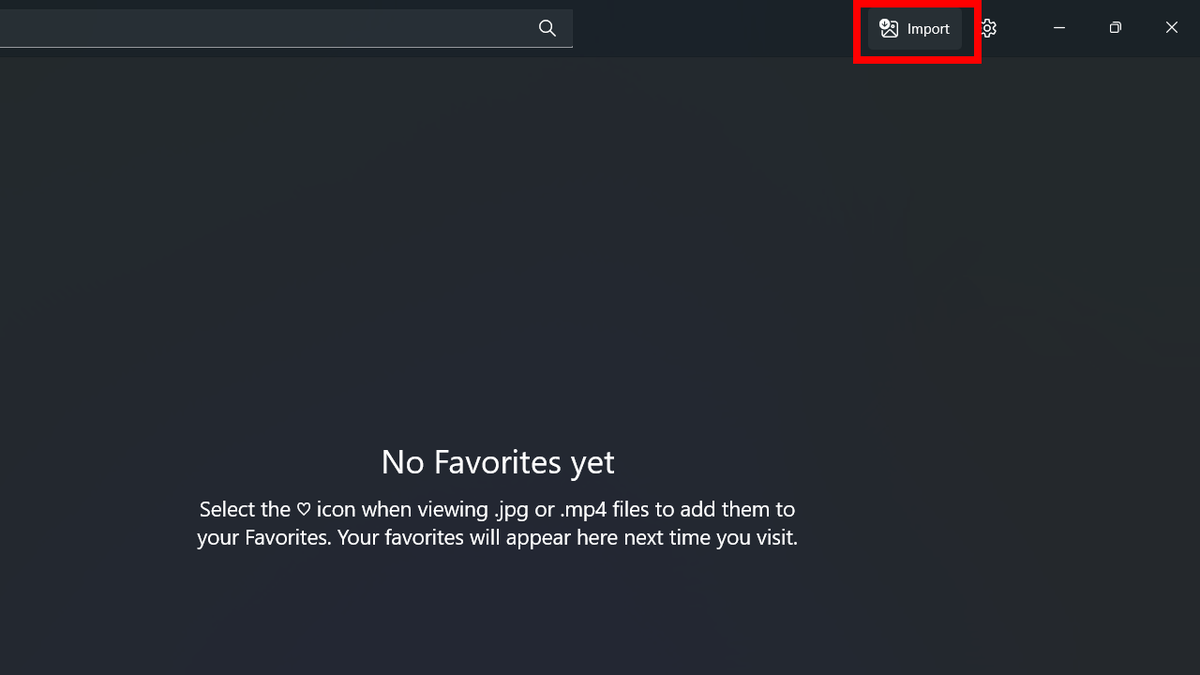
Steps to transfer photos and videos from your phone to a Windows PC (Kurt “CyberGuy” Knutsson)
- Select your iPhone or Android phone in the menu on your computer.
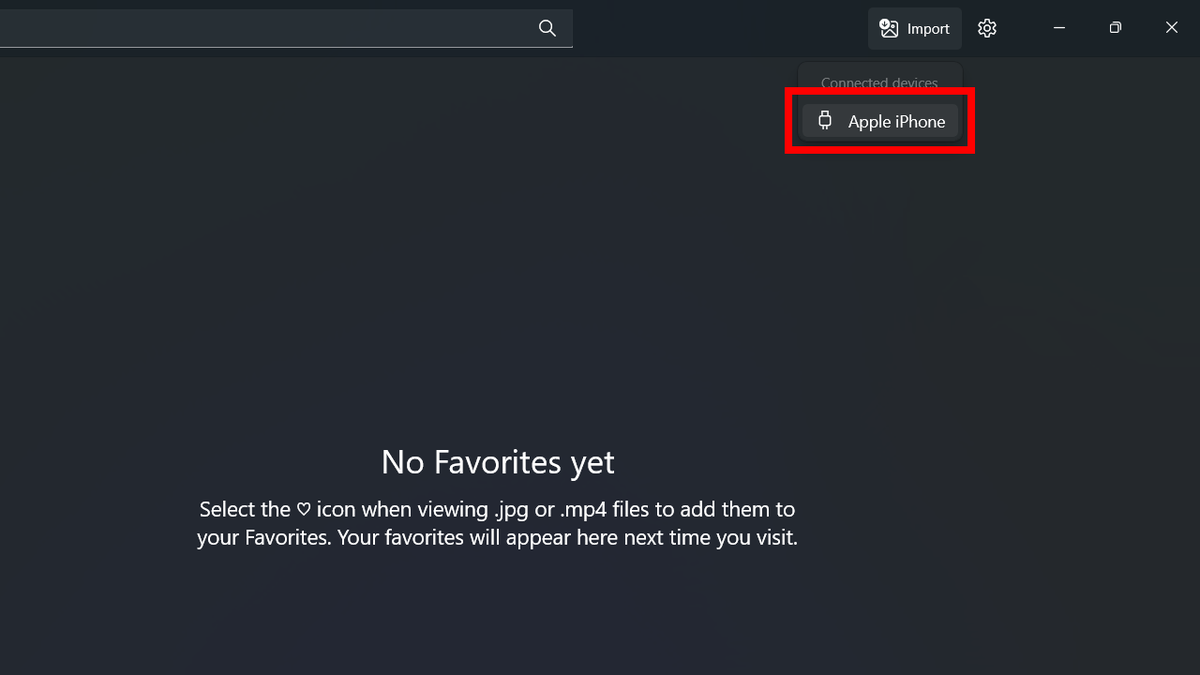
Steps to transfer photos and videos from your phone to a Windows PC (Kurt “CyberGuy” Knutsson)
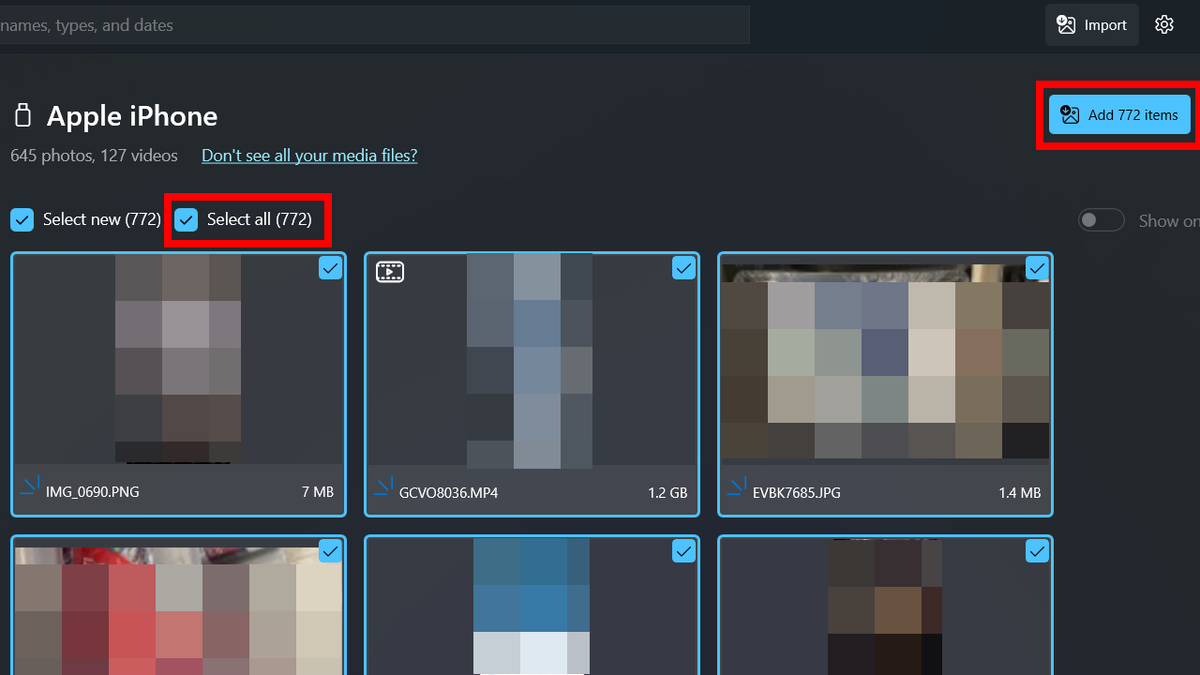
- Wait for the photos and videos to load, and once they do, select the ones you want to move or click Select all to pick them all.
- Afterward, click the blue Add [number of photos] items button in the top-right corner of your computer to queue them up. Here, the “number of photos and videos” refers to the number of images you have selected to transfer.
Steps to transfer photos and videos from your phone to a Windows PC (Kurt “CyberGuy” Knutsson)
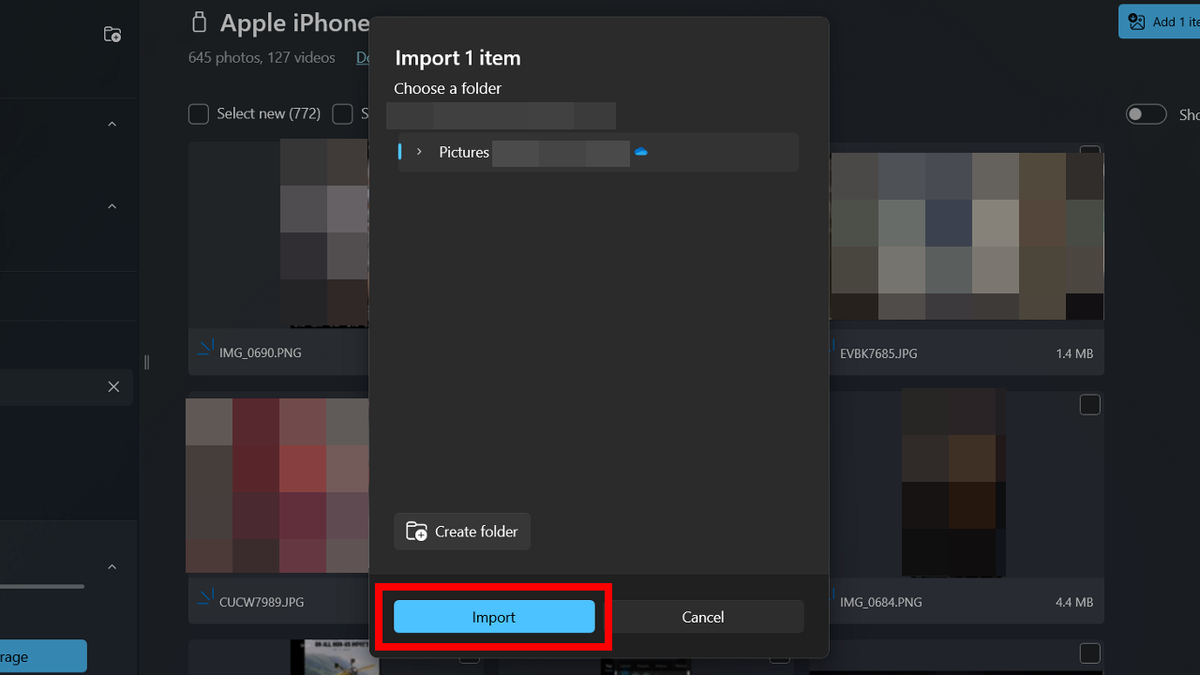
- Select where you want the photos to be stored and click Import.
Steps to transfer photos and videos from your phone to a Windows PC (Kurt “CyberGuy” Knutsson)
- Wait for the photos to finish syncing to your Windows computer.
If you moved your photos and videos to a computer and then deleted them from your phone, they’re gone from the device but remain safe on your computer. Always double-check that your transfer was successful before deleting anything from your phone.
HOW TO HIDE PHOTOS ON YOUR IPHONE AND ANDROID FROM SNOOPS
How to transfer Android photos and videos to Windows using the DCIM folder
For Android users, accessing the DCIM (Digital Camera Images) folder directly through Windows File Explorer provides a simple way to transfer photos and video from your phone to your computer. Here’s how to do it:
- Connect your Android phone to your Windows computer using a USB cable.
- Open File Explorer on your Windows computer.
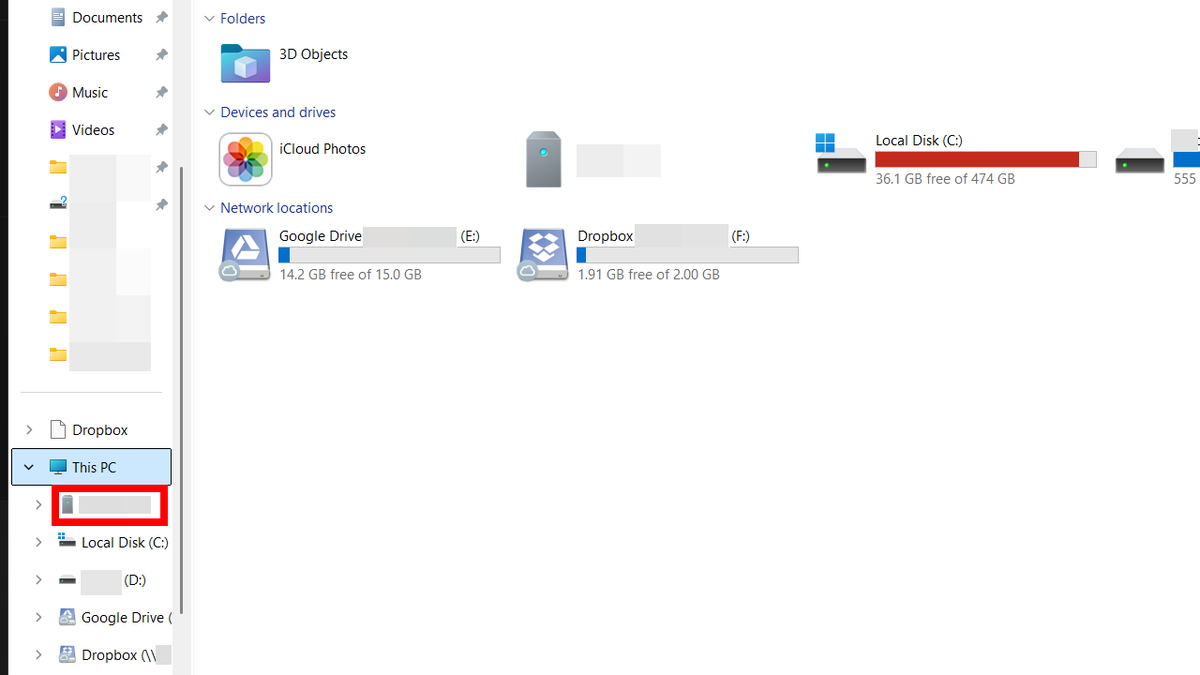
- Select your Android device in the Navigation Pane under This PC.
Steps to transfer Android photos and videos to Windows using the DCIM folder (Kurt “CyberGuy” Knutsson)
- Select Internal storage.
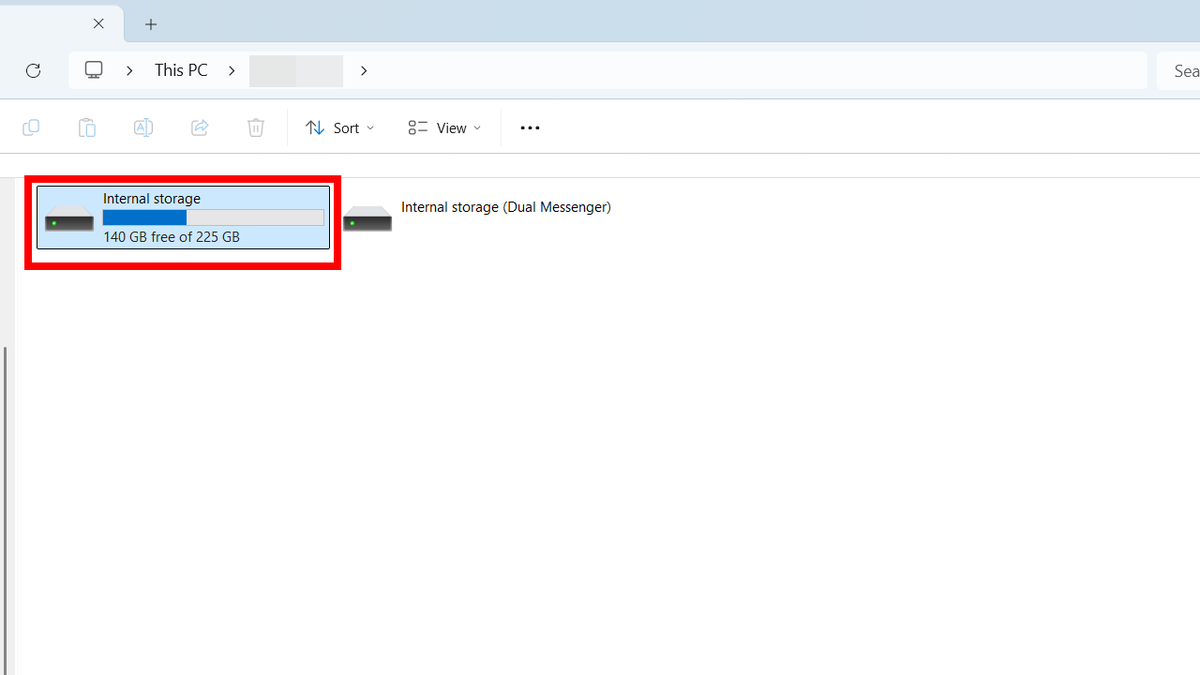
Steps to transfer Android photos and videos to Windows using the DCIM folder (Kurt “CyberGuy” Knutsson)
- Select the DCIM folder on your Android device.
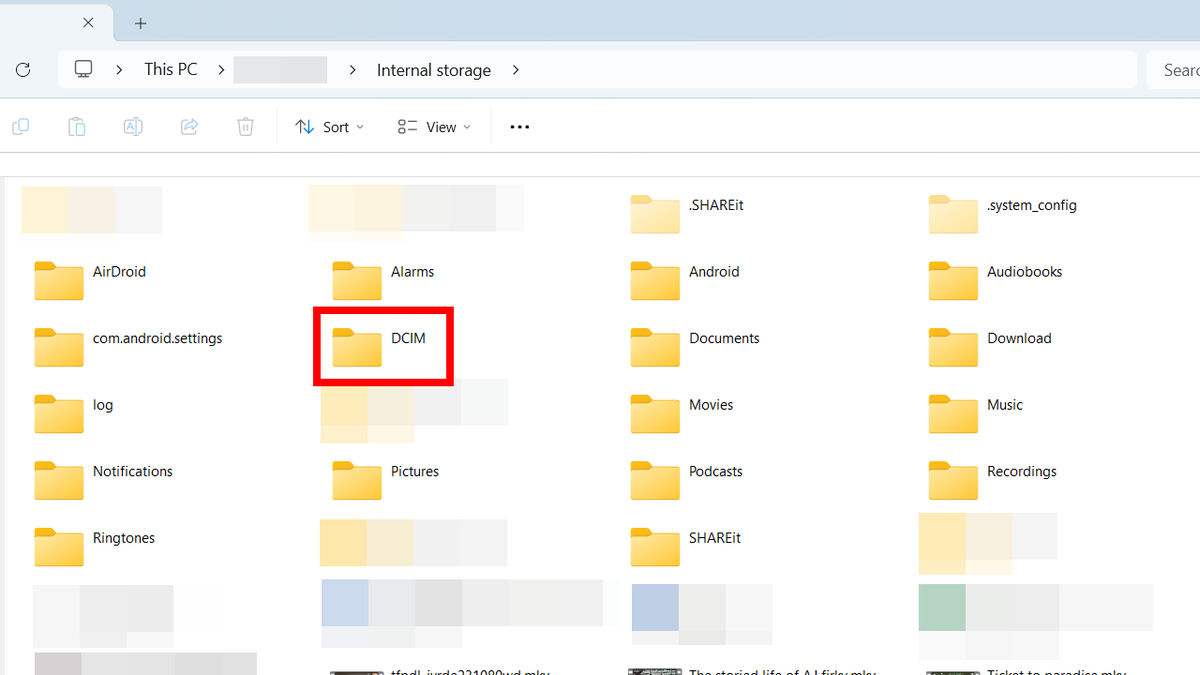
Steps to transfer Android photos and videos to Windows using the DCIM folder (Kurt “CyberGuy” Knutsson)
- Select the photos and videos you want to transfer from the folders within.
- Copy and paste the selected photos to your desired location on your Windows computer.
- Wait for the transfer to complete before disconnecting your phone.
SUBSCRIBE TO KURT’S YOUTUBE CHANNEL FOR QUICK VIDEO TIPS ON HOW TO WORK ALL OF YOUR TECH DEVICES
Kurt’s key takeaway
It’s a mistake to wait until something happens to start moving photos off your phone. We recommend creating a backup schedule so that you’re never without a way to restore them or free up space on your device. The initial moving process can be long, but doing it in the future will definitely be faster. You can also create extra backups by transferring the photos to external storage.
How do you feel about the role tech companies like Apple, Google and Microsoft play in managing and protecting your personal photos? Have you had any positive or negative experiences with their backup services? Let us know by writing us at Cyberguy.com/Contact.
For more of my tech tips and security alerts, subscribe to my free CyberGuy Report Newsletter by heading to Cyberguy.com/Newsletter.
Ask Kurt a question or let us know what stories you’d like us to cover.
Follow Kurt on his social channels:
Answers to the most-asked CyberGuy questions:
New from Kurt:
Copyright 2025 CyberGuy.com. All rights reserved.